How to Make a Photo ID Card in 5 Minutes

Today ID cards with a photo are a must-have for large companies and small firms, activity clubs and student’s meetings, as well as other organizations and self-employed workers. Providing your company’s employees or club’s members with photo ID cards, you put the face to the services you offer and make the communication with clients feel a lot more personal.
Luckily, to make your own ID card, you won’t have to hire a professional designer. With a proper photo ID card creator, you can easily create one on your own, no design experience needed.
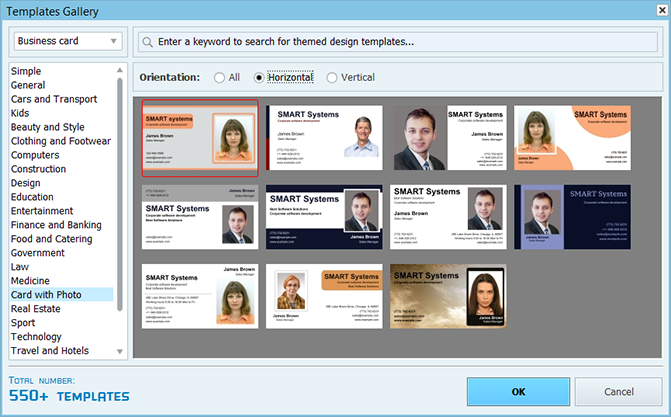
Step 1. Pick a Suitable Ready-Made Card Template
Download the free trial of Business Card Maker and launch it on your computer. In the startup wizard, click Design Templates to choose a suitable card template from the built-in gallery. There are plenty of ready-made layouts with an ID photo. Pick the design you like and hit the OK button to customize the card and insert your contact information.
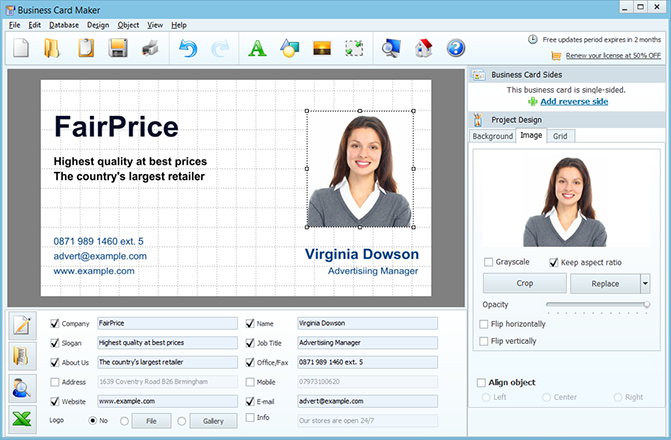
Step 2. Replace the Default Photo With Your Own
A good choice of an ID photo for your card can create an expert image of your company. Click on the default photo and then hit the Replace button in the right sidebar to upload an image from your computer. The program supports JPGs, PNGs, TIFFs, and lots of other file extensions. From there, it’s a simple matter of dragging and dropping your images to where you need them to be on your design. If needed, use the Crop tool to showcase only the best parts of the picture.
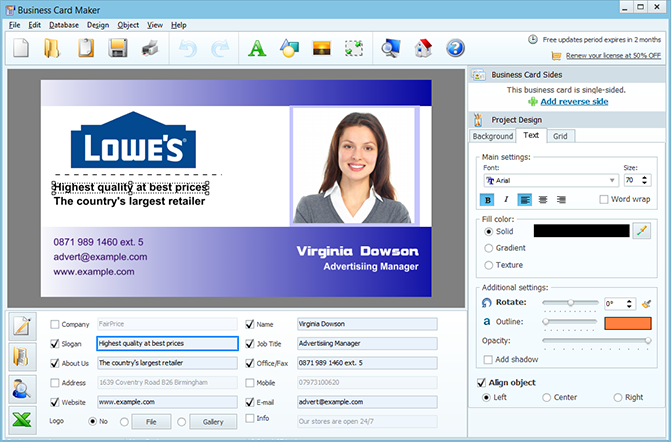
Step 3. Make a Photo ID Card Truly Personal
Different kinds of ID cards fulfill different functions so it’s important to customize the chosen layout to meet your requirements. Keep your photo ID card simple by adding your company’s logo, or get busy with color schemes that favorably showcase your brand. Click the icons at the upper toolbar to insert shapes, lines, icons or illustrations. If necessary, change the size of these objects by dragging on any of their corners and align them using the Align object tool.
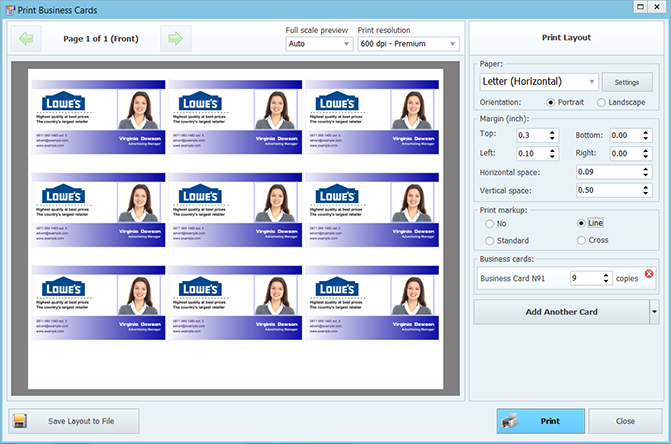
Step 4. Print Your Finished ID Card
You can order your finished photo ID cards via a professional printing service or print them at home. Click File > Print or hit the Print button to open the print wizard. There you can set the paper size, margins and a number of copies to fit onto a single page. Don’t forget to add print markups so it’ll be easier to cut out each card. Combine various card designs on one page. Save personal print layouts for later use.
Ways to Make Your ID Card Truly Unique
How to make your own ID card really stand out from other designs? Here’re more ideas on how to further personalize your card design:
- Change the typical horizontal orientation of your card into vertical
- Make your ID photo card double-sided to fit more information
- Use some photographic image as the background & play with opacity settings
Business Card Maker offers you a cost-effective way to create ID cards with a photo, business cards with your logo, contact cards and badges. Don’t let the grids and dimensions scare you away from making a unique card design for any occupation or membership group. Experiment with texts, colors and shapes until you create the design that’s just right for you!
Full version price - from $27.00.